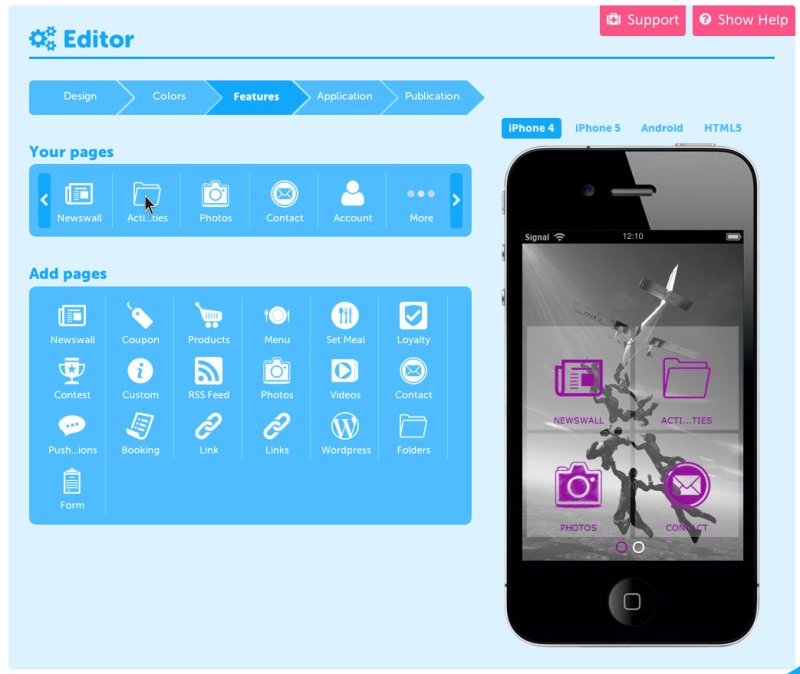
Inside the FEATURES tab of the Full-Blown Apps Editor interface, are all the tools you will use to create the various screens for your App.
For detailed information on each of the Features, please scroll down to see each of the sections below...
Thanks to this feature, your customers can schedule an appointment at your business(es).
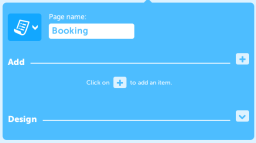
If you want to add this feature to your application, that is very easy. First of all, you have to click on the Booking feature:
Then, you have to click on 
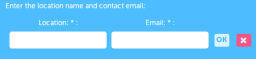
If you have several businesses, you can add these businesses to your Booking feature. To do that, you only have to click on 
Why this information?
The location of your business(es) is important for your customers, so that they know exactly where they schedule their appointments.
Thanks to the email address of your manager, the application will send him an email to validate the appointment.
And the result:
The form feature allows you to do plenty of things like giving your clients the opportunity to ask you questions, to order products, send a photo or to join an event… To sum up, this feature will adapt to your expectation about form.
So let’s see how to create a form page.
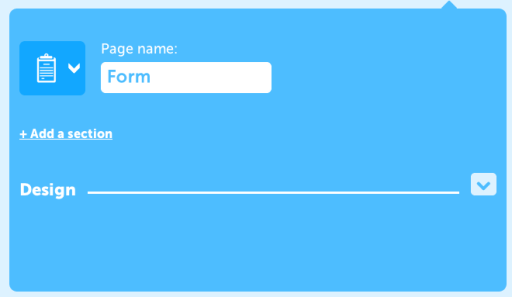
Step 1:
To create a form click on 
Step 2:
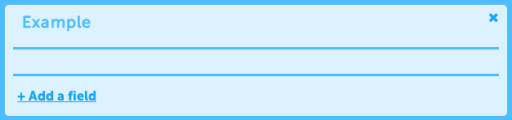
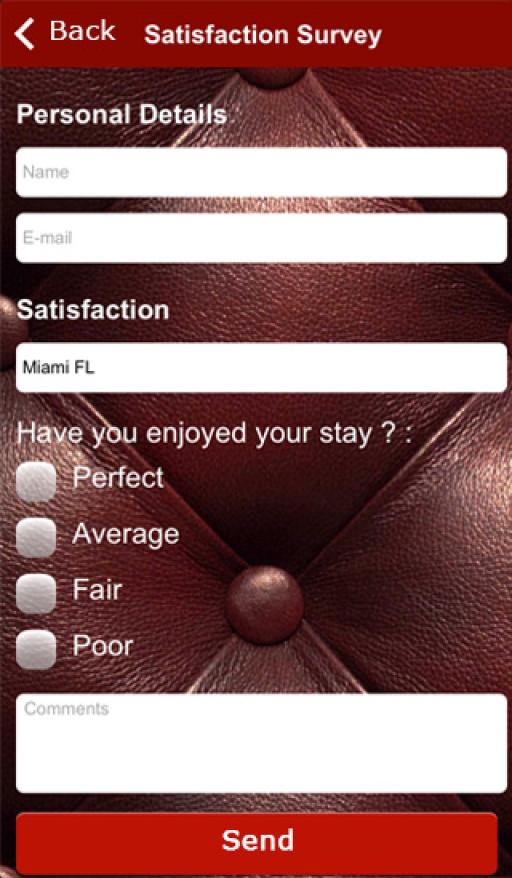
To create a first section click on “+Add section”. Give a name to this section. Here we will start by “Example” to show you what is possible to do with this feature. Then this window appears:
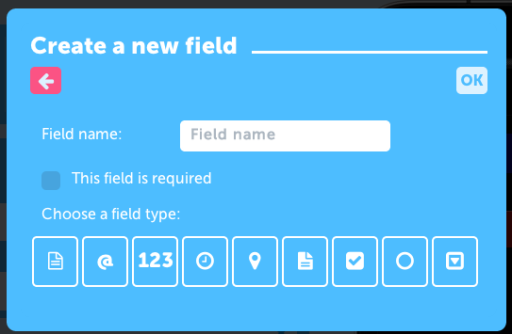
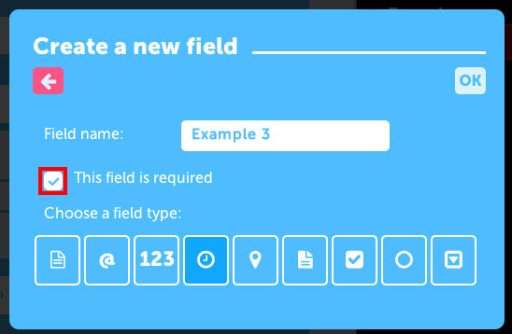
To add a field click on “+Add a field”. This window appears:
Let me introduce the different fields:
: this field enables the user to write a short text (ex: his name…)
: this field enables the user to write his email address to contact him.
: this field enables the user to write a number (ex: the number of people for a reservation)
: this field enables the user to write the date and hour (ex: the hour he wants to pick up what he orders)
: this field enables the user to indicate his GPS position when he sends the form.
: this field enables the user to write a long text on several lines (ex: a client can write his answer here)
: this field enables the user to select several options
: this field enables the user to only select one option between the ones submitted.
: This field enables the user to select the option they want.
Every times you enter a new field, you have the possibility to make this field compulsory. It means that the user cannot send the form if this field is empty. To do this click here:
You can create as many fields as you want in a section. But we recommend you to organize your form clearly to be easy to fill by the user.
Once you have entered all the fields you want to set up, you only have to indicate the email address of the manager in the appropriate box.
Some Examples:
With the Commerce feature you will be able to sell your products from one or several points of sale. Users will be able to pay online via Paypal, or to pay at your point of sale or when they are delivered.
Let’s go!
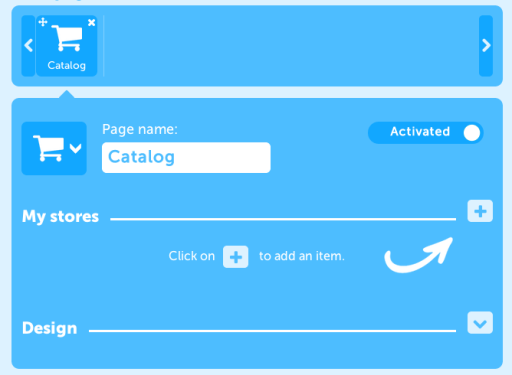
1. Create a point of sale
After adding the Commerce feature to your app, click on 
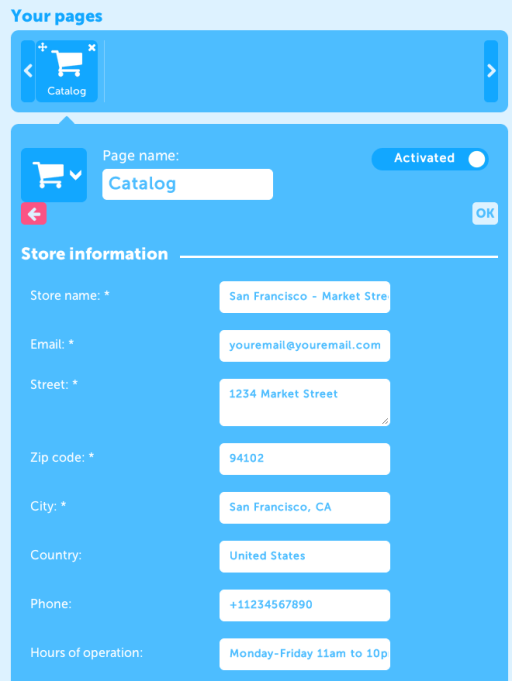
Then fill out with your store info:
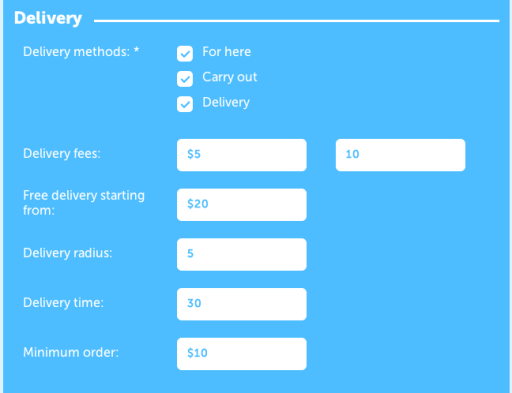
Then add your delivery options. You can choose from:
“For here”: meaning that people should come to eat/drink/whatever in the store
“Carry out”: meaning that people should come to the store to get the product and then leave the store with the product
“Delivery”: meaning that you are able to deliver them
If you choose “Delivery”, some other options are displayed:
“Delivery fees”: the cost of the delivery
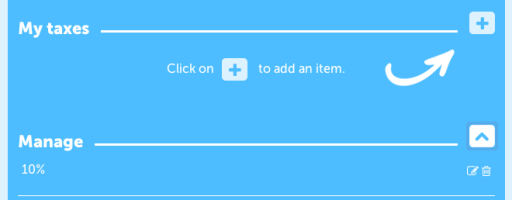
“Tax”: indicate your tax in percentage, if zero write “0”, if 10% write “10”.
“Free delivery starting from”: if you want the delivery to be free when the order reaches a certain amount
“Delivery radius”: indicate the area you deliver from your store address, in radius.
“Minimum order”: if an order has a minimum amount for you to deliver a client
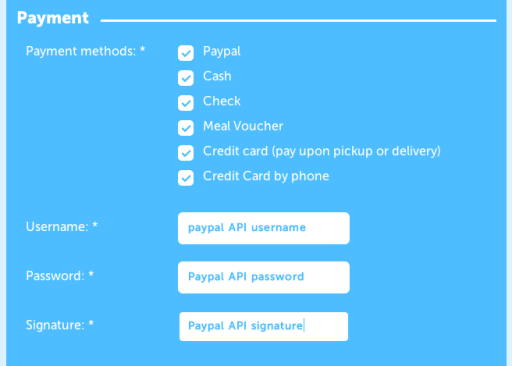
Then add your payment options. If you choose Paypal, you’ll need to do some mandatory operations in your Paypal account to enable it in your app. It’s the only online payment solution you can have in your app. “Credit card” is only here to tell users they will be able to pay in the store or to the delivery man with credit card, not within the app.
Save by clicking on 
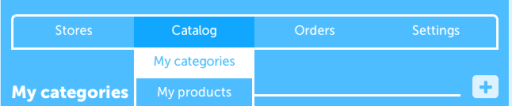
2. Create categories for your products
Then go in “Catalog” and click on “Categories”:
Click on “+” to add your categories.
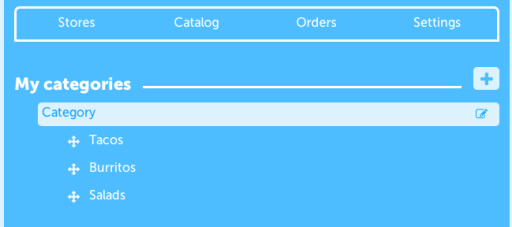
A first one is automatically created but won’t be shown to users. It’s your root category but once again it will not be shown to users so you can leave it like that. Select it and click on “+” to add a subcategory (in fact, as the root category is not shown, this new category will be a main category). Add as many categories and subcategories as you need:
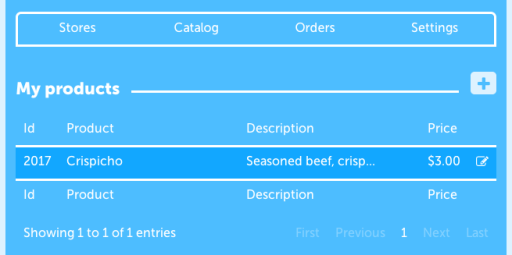
3. Create products
Then click on “products” from the main menu in “Catalog”, the products page is displayed:
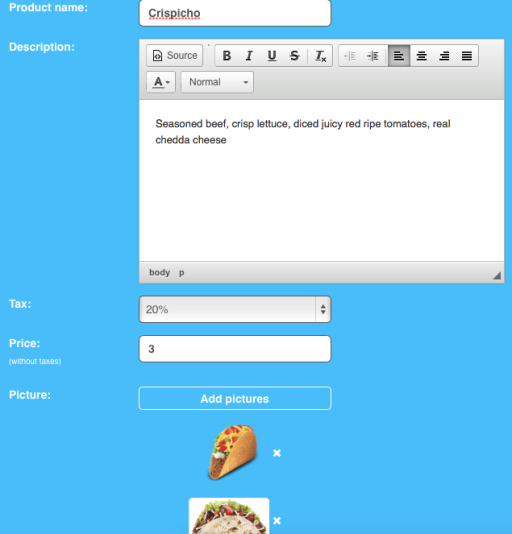
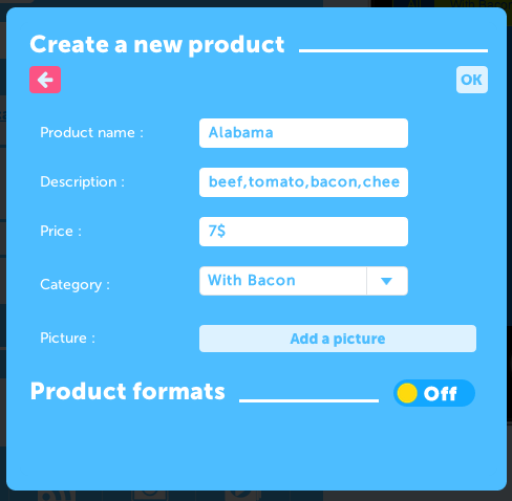
Click on “+” to add a product. And fill out with your new product info. Add as many photos as you wish.
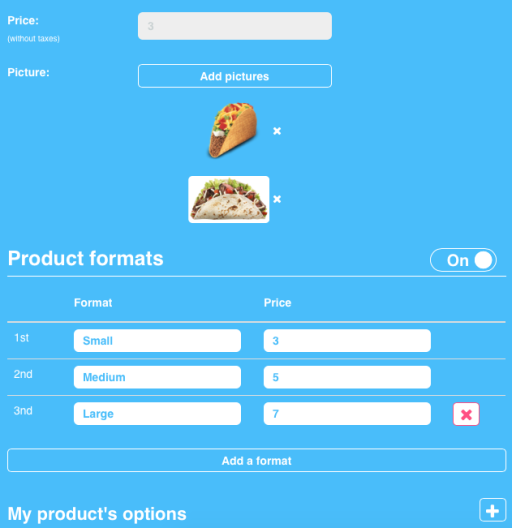
You can add some sizes to your product. Switch on Product Formats and then fill out sizes information of your product, with a price for each size. Note that if you activate this function, you won’t be able to change the price of your product in the main menu as you did just before. The price displayed in the app will be the smallest one (“from 3€” for example).
Product Formats
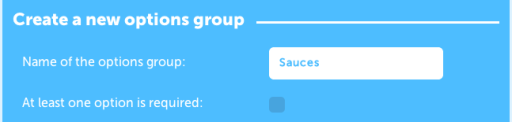
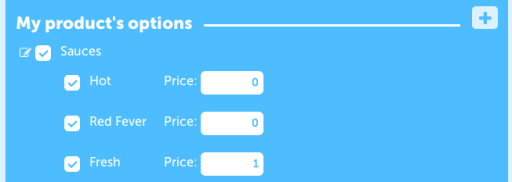
You can also add some options to this product. By options we mean sauces, complementary products, etc.
Here is an exemple with some sauces.
First, create a new options group:
If you check “at least one option is required” the user will have to choose from the sauces you offer when he orders the product. He will not be able to order without choosing one of these options (that’s useful when you have many sizes for a product, as we will see next).
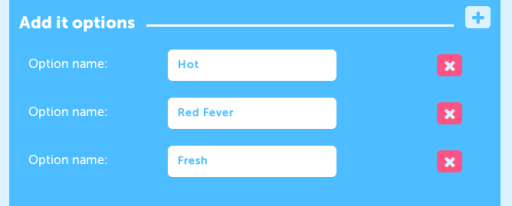
Then, in the “Add it options” section, click on “+” to add options to this group of options:
Click on “OK” to save.
Now, in your product details page you can see your options below.
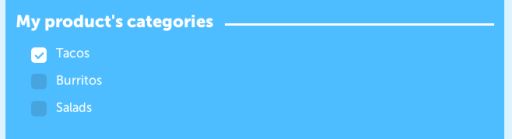
Then check the categories for your product:
And click on “OK” to save your product.
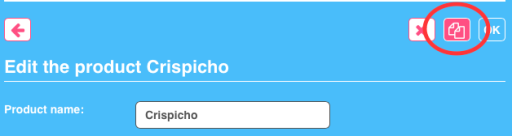
You can also duplicate a product if you want to create a new product that doesn’t have many differences from another one.
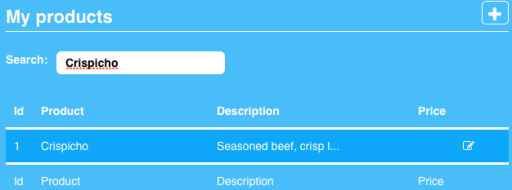
If you have many products in the feature, it can be difficult to scroll to find the one you are looking for. That’s why we implemented a search bar, where you can type its name and find it easily.
4. Manage
In the “Orders” menu, you will be able to see and manage the orders you receive.
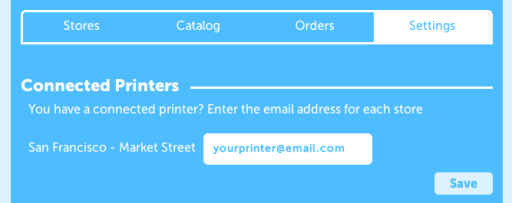
In the “Settings” menu, you will be able to link, for each store, a connected printer to your app to print orders when they arrive, and also to manage your tax rates if you have several:
You’re done!
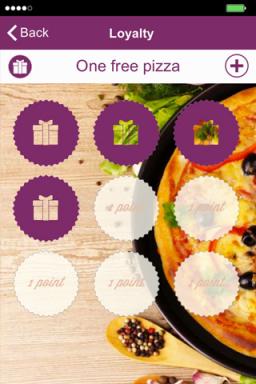
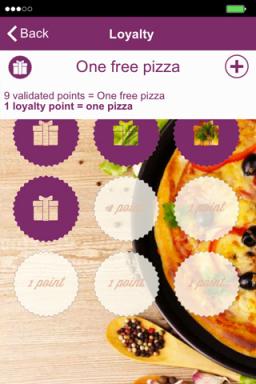
With the Loyalty feature you’ll be able to create a loyalty’s punch or stamp card. It means there will be a reward after a number of purchases. For example “one burger for ten bought”.
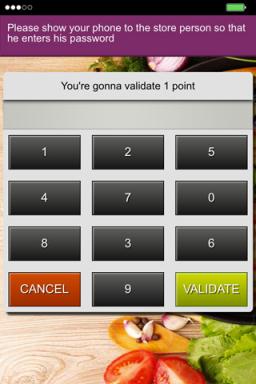
To validate a loyalty point the business owner will have to enter a four-digit password. As with loyalty stamp card, the client has to show his card to the retailer for stamping it, with our digital loyalty card, the client has to show his smartphone and the retailer has to enter his four-digit password to validate a point.
1. Loyalty card creation
Here are the things required to create a loyalty card:
the total number of points
the reward
what’s the condition to validate a point
Here is an example:
2. Four-digit passwords creation:
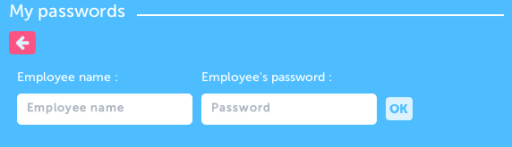
It is possible to create a password for each employee. Like this it will be more easy to verify who validates what.
To create a password, you just have to click on the “my passwords” button:
3. The loyalty card in the application:
To validate a point, the client “touches” a point and shows his smartphone to the retailer:
The retailer chooses the number of points and enters their password :
Note:
It is not possible to edit or delete a loyalty card. Why? Because it works like a real punch card, when a user gets a punch card with a particular offer and begins to validate some points on it, it can’t be changed (meaning that it would be too easy to attract customers with a big offer and then to change it for a lower one while they already have some points validated on it).
But it’s possible to create a new card with a new offer. All the customers who have already validated points on the old card, will keep using this card until it is completely validated, and then they will get the new card. The customers who haven’t validated points yet on the old card, will get the new one instead.
This feature allows you to integrate feeds from blogs or news websites either from the business for which you’re creating the application or other sources in relation with the business or both. You can create as many feeds as you want.
Here is how it works:
It doesn’t matter if you know or not the feed link you want to integrate.
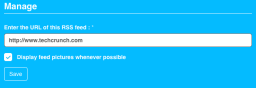
Just enter a title for your feed and then the url of the website from which you want to extract the feed. Click ok. If there are some feeds for this website, the system will display them and let you choose the one you want.
In a second case, you can just enter the name of the site you want to extract the RSS feed. The system will automatically scan this website to find the RSS feeds on this one.
Then just choose the feed you want to display and save. You obtain this:
You can choose a different design for your page, from the design section at the bottom of the feature:
With this feature, you will be able to create a list of geolocated places.
It will display all the places on a map, or, if the user opens the sheet of a particular location, he will be able to get the path and directions to this location, by walking or driving. The listing of the locations is sort according to the distance between the locations and the user, from closest to farthest.
After having added the feature to your app, click on the “+” to add a place to the list.
You can add an image that will be displayed in the list for this location, a title, and a subtitle:
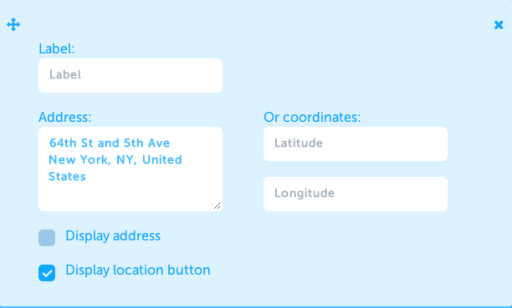
Then, you have to enter an address for this location, or its coordinates. You can add a label for this address but it’s not mandatory.
If you check the “Display address” checkbox, the address will be shown in the sheet of the location. If you check the “display location button” checkbox, it will display the button that will allow the user to see the path to this location.
Then you can add other sections like text + image, photo gallery, videos. These sections are the same than in the Custom page feature, thus you can take a look to our support article about the Custom page feature to see how it works. You can also add touch to call buttons, or web links buttons.
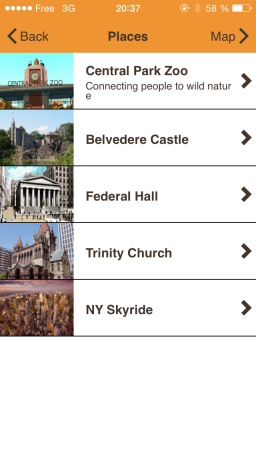
Once you have set up the list, it could look like that:
The list:
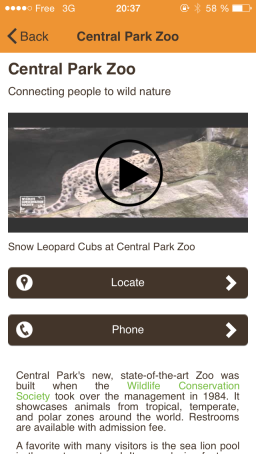
The location sheet:
And you’re done!
Thanks to this feature you will be able to lock your app wholly or partly. The locked content will be accessible for authorized users only. We are going to see how to set up this feature.
First, you have to add the Padlock feature to your app, click on the Padlock Icon from “Add pages” to add this feature to your app.
Then you can set it up.
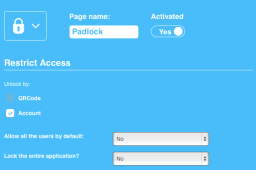
You have two possibilities to unlock the Padlock and grant access to the whole applications to registered users. The first one is to use a QR Code and the QR Code Scan, and the second one is to create an account for your users, or to let them create their own account. Of course you can use both at the same time if you want, it’s up to you.
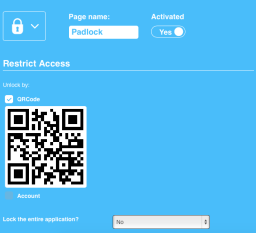
To allow your users to unlock the Padlock by scanning a QR Code, select QR Code in the Padlock feature. This will create a QR Code that you have to save and print and, for example, display inside your store to allow your customers to unlock some parts of your app by using the QR Code Scan.
Now let’s see how to set up the pages that will be locked by the Padlock.
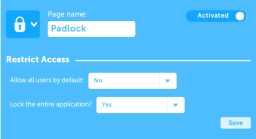
“Allow all users by default”:
If you select “yes”, all users who have already an account on your app, or users who create an account on your app, will be allowed to access to the locked content. Setting on “yes” is useful to create a database of registered users who are the most engaged with your content.
If you let on “no”, that means you will have to authorize your users manually from the “Users” menu which is between the “Analytics” and “Extra” menus. We will see how a little bit later in this article.
“Lock the entire application”:
If you choose “yes”, your whole app will be blocked. And users will have to create an account or to create an account and to be authorized depending on what you have chosen for “Allow all users by default”. With this option you can create a private app.
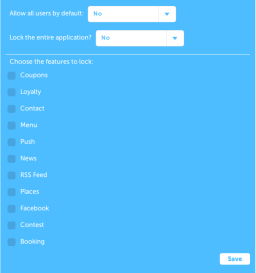
If you choose “no”, you will just block some pages of your app:
Just choose from the list the pages you want to block. Of course, you need to have added pages to your app. You can add pages later and open this feature again to block them. The locked pages will not be displayed to the users until they are authorized to see them. Instead of seeing the tabs of this pages, they will just see one tab meaning there is a private content behind:
Once the user is logged in and authorized, the padlock tab disappears and all the tabs are displayed:
How to authorize the users.
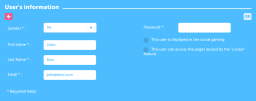
If you have chosen not to authorize all the registered users by default, you will have to authorize them manually from the “Users” menu, in the editor:
Click on it. All the users who have created an account in your app, are listed.
Click on 
If you want to authorize the user, all you have to do is to check the corresponding checkbox “This user can access the pages locked by the “locker” feature. Then click on “Ok”.
A little warning regarding the publication of your app on the App Store. Before submitting an app, create a test user with authorized access. Then, when you publish your app on iTunes Connect just fill out these info in the user demo fields to let Apple reviews what is behind the padlock feature.
This features allows you to create Product pages.
Little warning: if you have menus, don’t create them with this feature but use the “Menu” feature instead which is more appropriate.
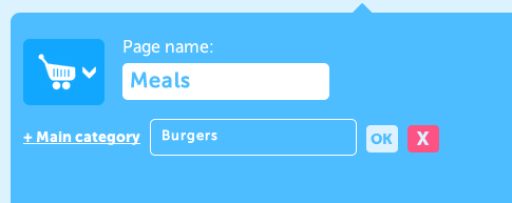
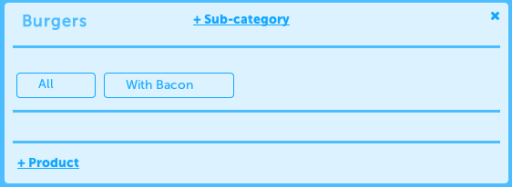
1. Create a main category (click on “+main category”):
2. There are 2 options:
create a sub-category if needed (by clicking on “+ sub-category”) :
or directly create a product (by clicking on “+ Product”) :
Notes :
- Think carefully about the order in which the main categories appear as they will appear in the same order they will be created.
- You can create all you main categories first, then all your subcategories and finally all your products in the appropriate subcategories.
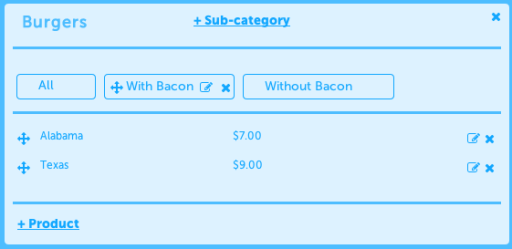
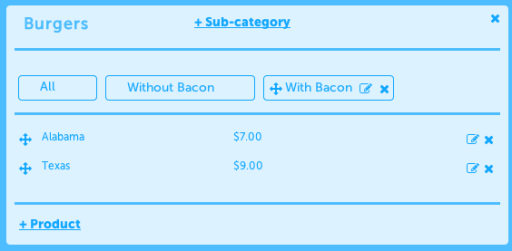
- You can drag and drop all your subcategories (in a same main category) by clicking on 
An example of a subcategory order modification:
The subcategory “With Bacon” is 1st:
The subcategory “With Bacon” is 2nd:
You can do the same thing with products:
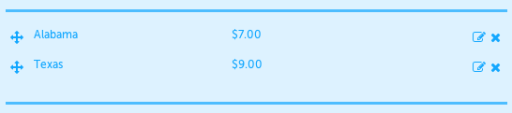
“Alabama” is 1st:
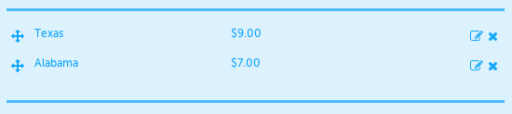
“Alabama” is 2nd:
You can obtain this:
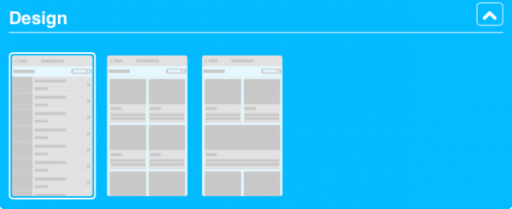
You can also choose another design for your page, from the different page designs at the bottom of the feature:
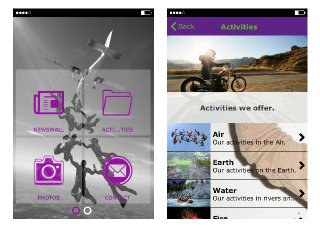
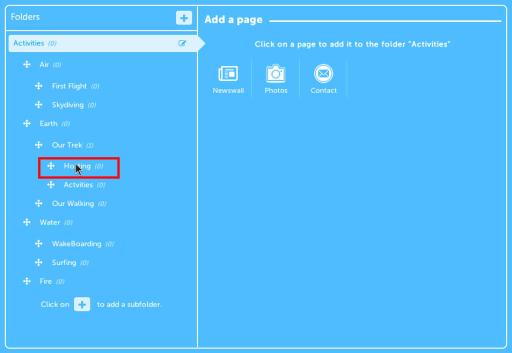
The Folders feature allows to create a Folder Tree inside your app.
The creation of a Folder
To create a folder, click on 
First of all, you have to give a name to the root folder. To do this, click on + to add a folder. This appears:
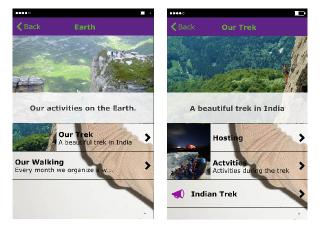
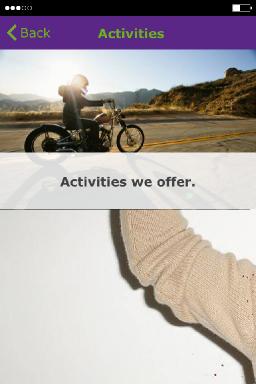
For each folder, you can add a picture and a subtitle. Here is an example:
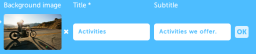
To create a second folder, you have to click on + and to fill all the cases (name of the folder, subtitle and picture). Do the same for all the folders you will create. If you want to change the name, the subtitle or the background image, you only have to click here.
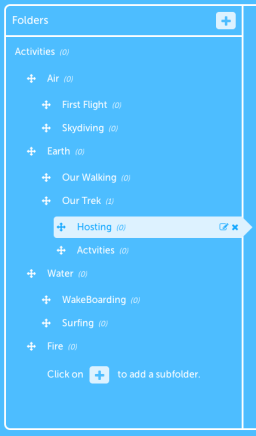
The structure
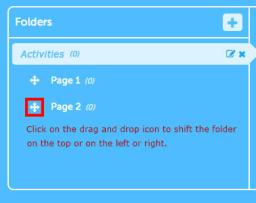
With the folders page, you can create different levels in your apps. You can classify your pages by themes. To do this, you have to use drag and drop:
If you move the Page 2 folder to the top, it will appear before Page 1 in the Folders. If you move the Page 2 folder to the right, it will become a subfolder of Page 1. In the end, you might have this kind of structure in your app. Obviously this application is quite complicated.
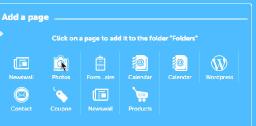
Add pages to your Folders
Note: You can ONLY add to your folders the pages you have already created. The folders page only enables you to classify your pages.
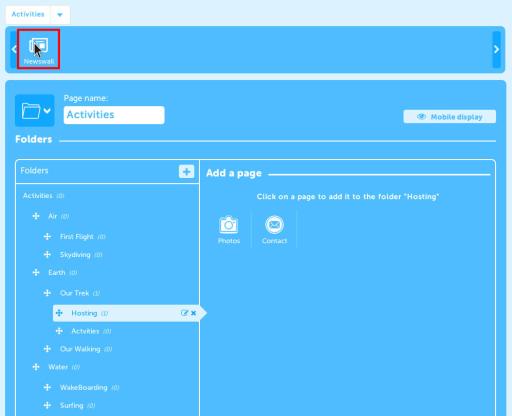
Adding a page to one of your folders is very easy. First: select the folder in which you want to add a page and then click on the page you want to add. For example “Hosting”:
Then click on the page you want to add to this folder.
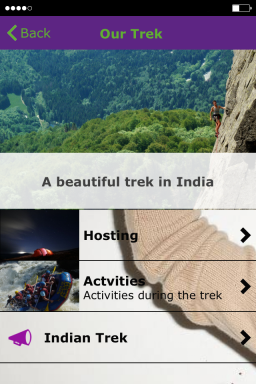
Here we are. We have added our first page to a folder. Do the same for each page you want to add. Here is an example of what you can create :
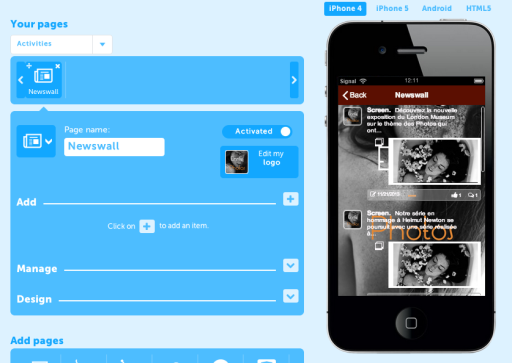
Editing your pages
You will see that, once you have added a page to a folder, this page will not appear anymore in the main feature slider. To manage the pages you have added on some folders, you have to open the Folders page. To do this, follow this process:- In the main feature slider click on the root folders icon you built:
– Select the folder or the subfolder in which the page you want to manage is.
– Click on the page you want to edit.
– Once you have clicked on the page you want to edit, it appears.
– To go back to the root folder, click on the icon of the page you have just edited.
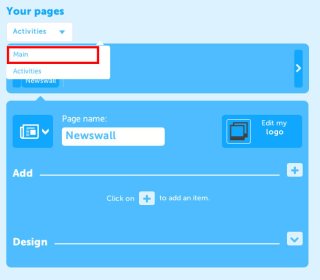
– If you want to go back to the main feature slider, click on “Main”
Removing a page from a Folder
Once you have classified a page into a folder, you still have the possibility to remove it from the folder.To do this click on the cross 
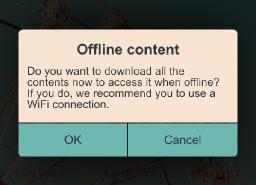
The Offline Mode is not really a feature, but it allows your users to download the contents of the app in their phones so that they can access it later, even if they have no connection. Let’s see how this works.
When the users download the app and open it for the first time, they will be asked if they want to download the contents to access it when they are offline. If they do it, they will be able to access all the contents that are in the app even when there is no connection.
But you have to know that everything that is linked to an external website will not be downloaded, like for example Youtube videos, Instagram galleries, or Facebook pages. As you have to get the content from outside the app, you need an internet connection to access it.